DeepSurface: Registration, Package Installation, and Initialization
DocumentationInstallation Guide
Overview
Let DeepSurface Host For You
Getting Started
System Requirements
Self Hosted Quick Start - Installing to Cloud Platforms
Self Hosted - Installation Using an OVA
Registration, Package Installation, and Initialization
First Steps After Initialization of the Console
Deployment Options
Main and Subordinate Consoles
Agent-Based Deployment
User Managed Scan Deployment
Credentialed Scanning Deployment
Mixed Environment
Deployment Tools
Active Directory Group Policy
Microsoft Endpoint Configuration Manager (part of InTune)
Tanium Deploy
HCL BigFix
Ivanti
Virtual Machines
VMWare
Virtual Box
VirtualBox Guest Additions
AWS EC2 (BYOL)
AWS EC2 (Usage Based)
Azure Cloud
Google Cloud
Additional Items to Consider
Main Console Server Certificates
LDAP
TOFU
Clock Sync
DeepSurface Commands
Multiple Vulnerability Sources
API Documentation
User Guide
Reporting
Dashboards
Exports
Risk Insight
Hosts
Patches
Vulnerabilities
Vulnerability Instances
Users
Remediation Workflow Manager
Plans
Settings
Integrations
Workflow
Exporting
Accepted Risk Plans
Accepted Risk Workflow
Explore
Model
Paths
Activity
Tasks
Configuration Alerts
Scan Logs
Notification Settings
Scanning
Status
Agents
User Managed
Credentialed Scanning Settings
Credentials
Scan Groups
General Settings
Cloud Scanning
Network Connectivity
Subordinates
Vulnerability Sources
Setup
Sensitive Assets: Polices
Sensitive Assets: Manual
Admin Settings
SMTP Settings
Certificates
Outbound Proxy
Authentication Providers
Users
Tags
Integrations Guide
Vulnerability Sources
CrowdStrike Spotlight
SentinelOne
Carbon Black Cloud
Microsoft Defender for Endpoint
Wazuh
Lansweeper Cloud
Nessus API
Tenable.io API
Security Center/Tenable.sc API
Rapid7 InsightVM API
Qualys API
Nozomi Guardian
Eclypsium
AWS Inspector
Remediation
Jira Software
Tanium (BETA)
Authentication Providers
LDAP (Active Directory)
SAML (Azure Active Directory)
SAML (Google)
SAML (Okta)
PAM
CyberArk
Delinea (Thycotic)
Microsoft LAPS
Security Guide
Firewall Configuration
Base Network Requirements
Agent Network Requirements
Credentialed Scanning Network Requirements
API Network Requirements
How DeepSurface Scans Work
Domain (LDAP) Scanning
Host Scanning Routine
Reasons for the Administrative Access Requirement
Endpoint Protection Considerations
Other Items
Scope of Data Storage and Retention
IPS/IDS Considerations
Logging
Resetting the DSADMIN password
Product Information
Changelogs
Open source Licenses
End User License Agreement (EULA)
If you are implementing {{COMPANY_NAME}} using a downloaded OVA from a link you received from {{COMPANY_NAME}}, be sure to visit the Installation Using an OVA page before proceeding with the instructions below.
After setting up your new VM, it is time to download and install the latest software packages from {{COMPANY_NAME}} Security’s public servers. Luckily, this is an automated process.
Note: It is assumed that you are now logged in to your VM as the dsadmin user via an SSH session.
At this point, run the following command from the VM command line:
sudo deepsurface-install
The steps to complete installation are presented in the screens that follow. Once installation begins, stopping in the middle can create an unstable system. Be sure you have 30 - 45 minutes to spend on completing the installation.
- Review and Agree to the license agreement that is displayed.
- Time zone - select the appropriate time zone or agree to the default setting. All scheduled tasks in {{COMPANY_NAME}} are configured according to the system time zone, so it is recommended you use a timezone that is convenient for your administrators:

- If you have an outbound proxy, configure that next. If you do not, select ‘No’. After you establish these settings, confirm them in the screen that follows. For more information on this configuration, see the documentation on configuring your outbound proxy.


- You can configure this console to be the ‘Main’ console, or a subordinate scanner of another console. (These steps assume you are trying to set up a main console VM. If you have already set up a main console host and are trying to set up a new subordinate scanner, please refer to the steps in the Subordinate Scanners section of this documentation instead.):

- The next screen will request the installation code you received from {{COMPANY_NAME}} Security. Enter it. In the VM terminal window, you should get a confirmation that the code was valid. Then the {{COMPANY_NAME}} packages will download and install. This may take a few minutes.
- Next, if you would like to browse the features of the console using sample data, you can confirm that option and the install process will load sample data for you, that will be removed as soon as the first {{COMPANY_NAME}} scans are run.

- At this point the console performs a collection of automated set up steps that require patience but should complete rapidly if you are connected to a sufficiently robust network.
- When the background automation is complete, you are ready to create your first console user!

- Enter and appropriate username in the screen presented:

- Enter a sufficiently complex password to secure the user. This user has full access to all the features available in the console. After you enter the password and confirm it, you can access the console’s web interface:

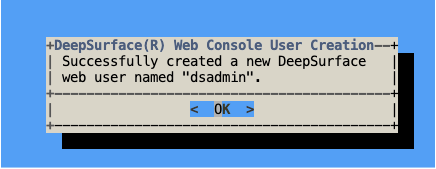
- Once installation is complete, the screen below presents itself. You can log out of your ssh session and proceed to logging into the web interface using the credentials you just created at https://
. Additional steps to prepare the console for production use are in the Additional Items to Consider section.

In case you ran into any issues with these steps, or just want to learn more about the scripts you just ran for this VM installation process, visit the installation script reference.